
Introduction to the MyPreOp+ portal
In this guide, you will learn:
- How to navigate the dashboard and filter assessments
- How to navigate left side menu
- How assessments are initiated
How to navigate the dashboard and filter assessments
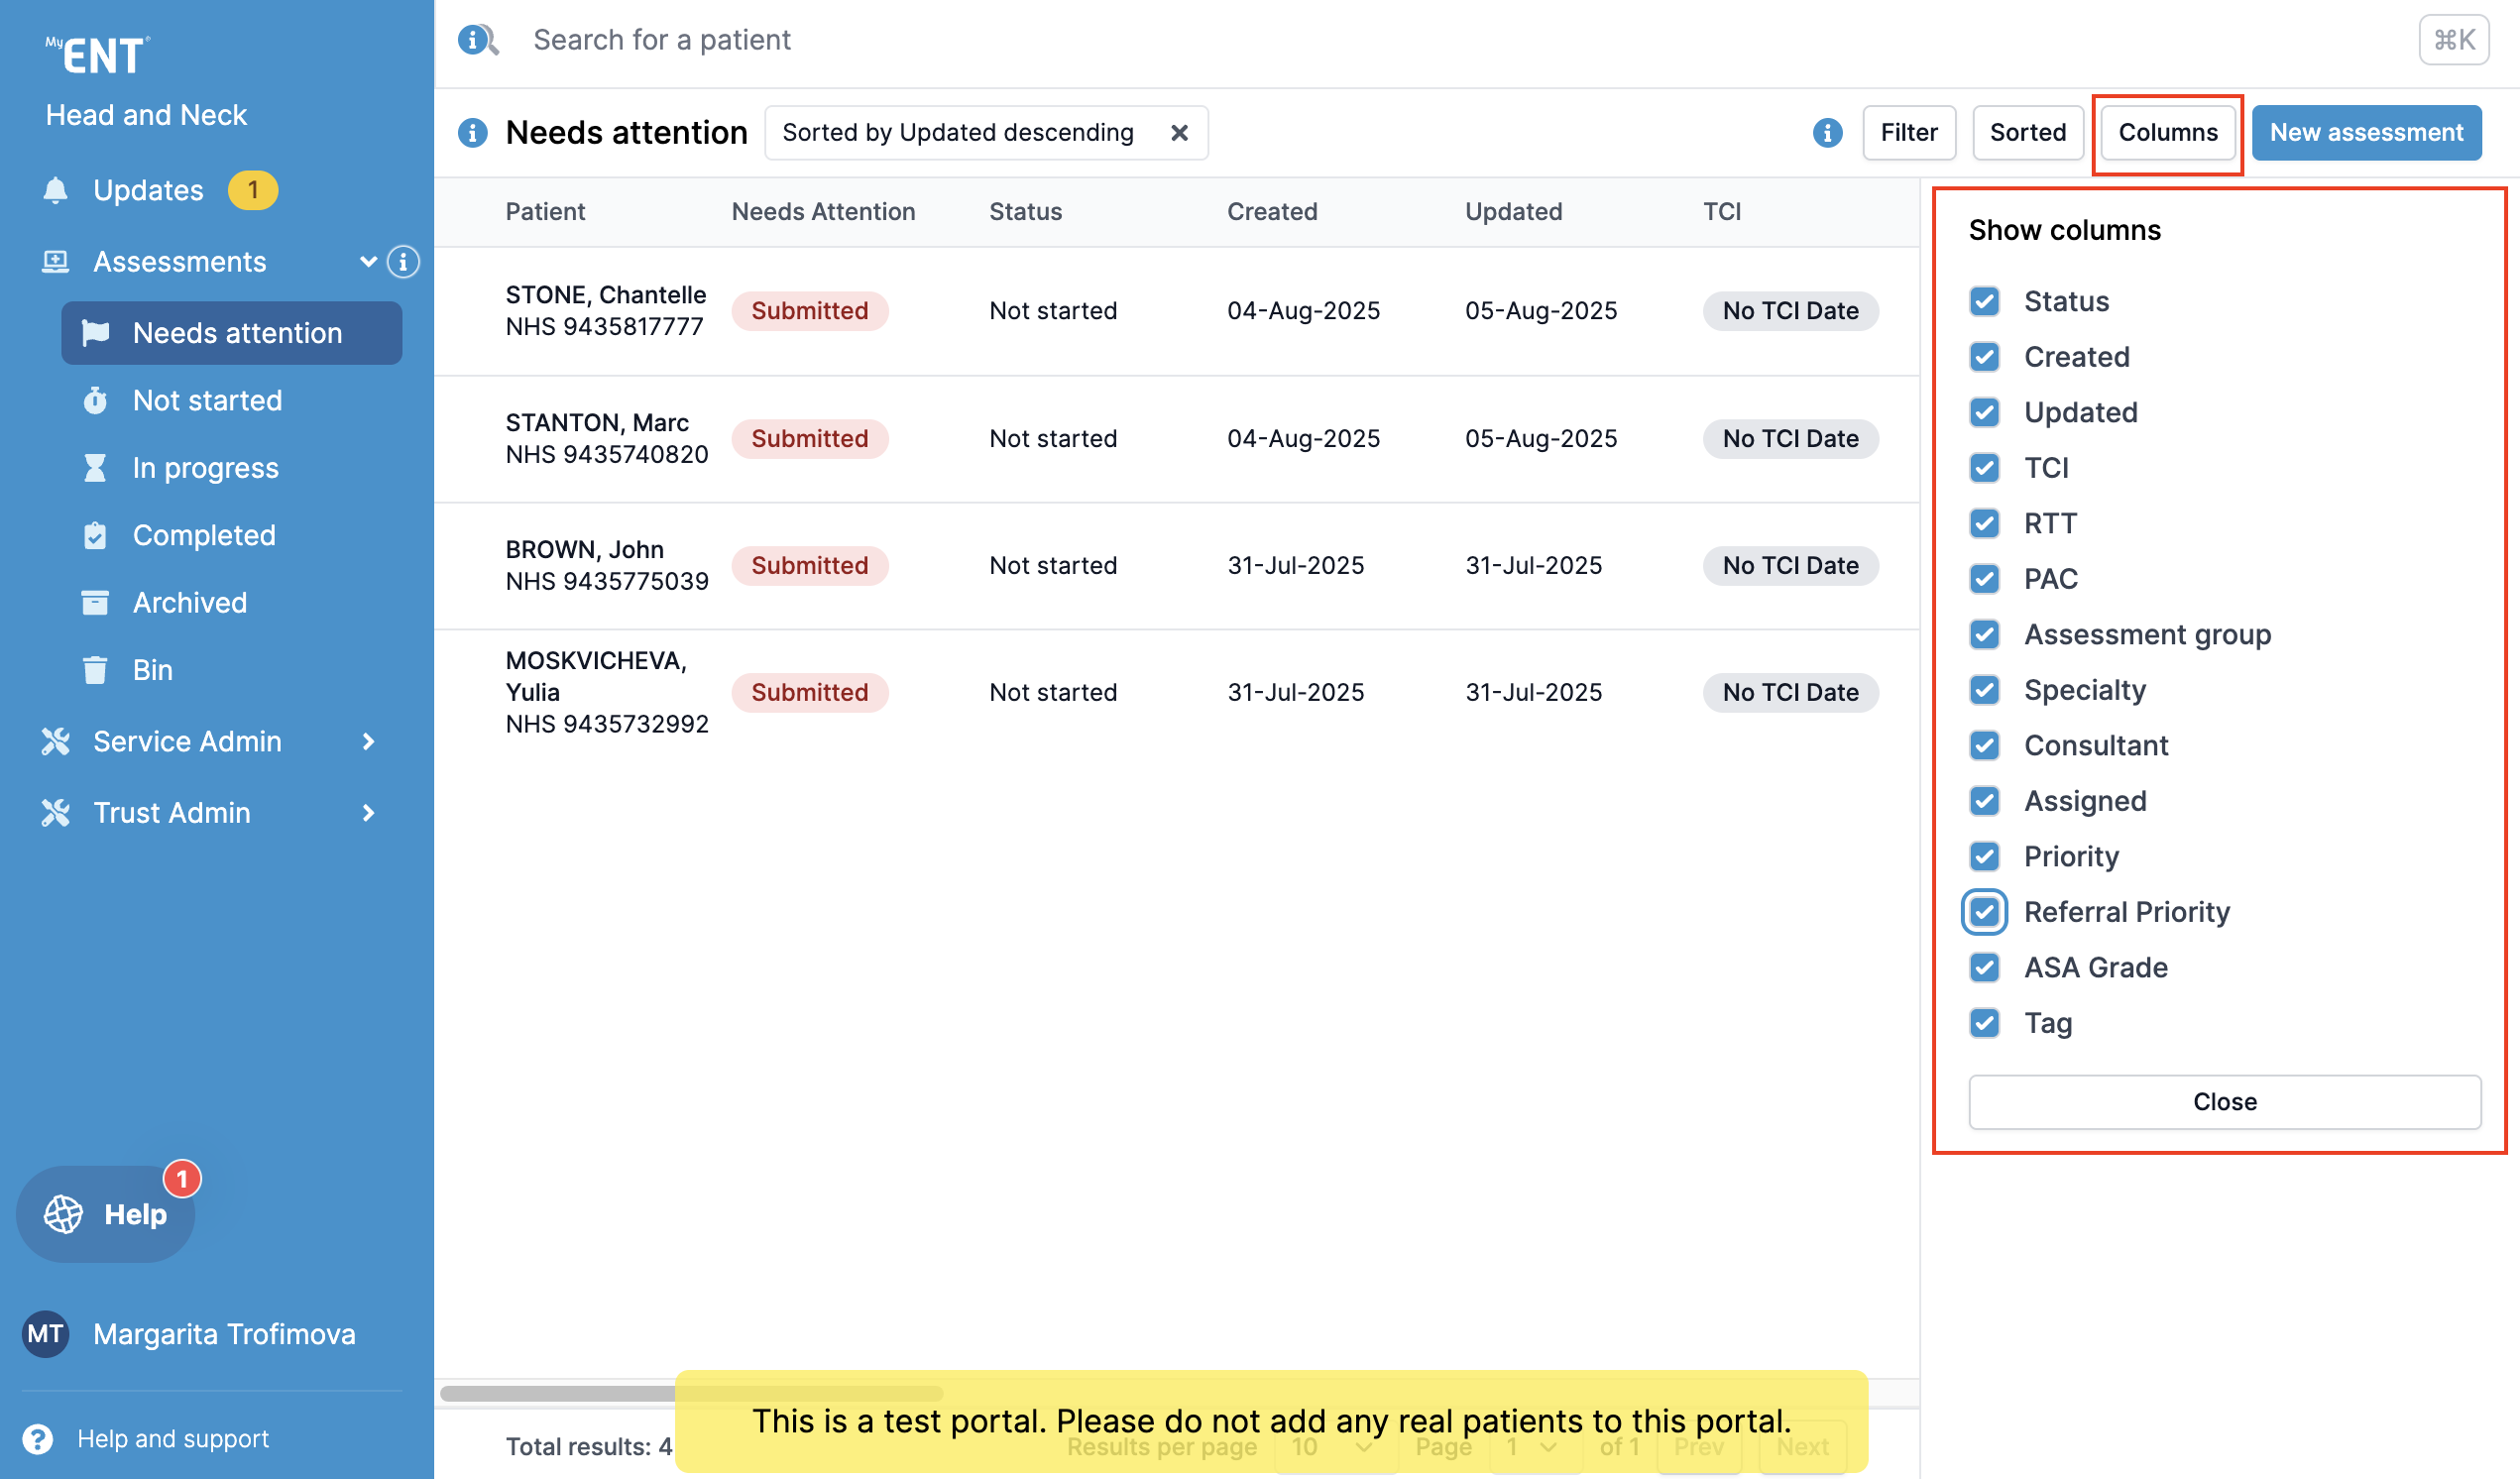
On your dashboard, you can view the following information :
- Patient details
- Needs attention
- Status
- Date created
- Date updated
- TCI date
- RTT date
- PAC date
- Service (or specialty)
- Consultant
- User assigned
- Priority
- Referral Priority
- ASA Grade
- Tag
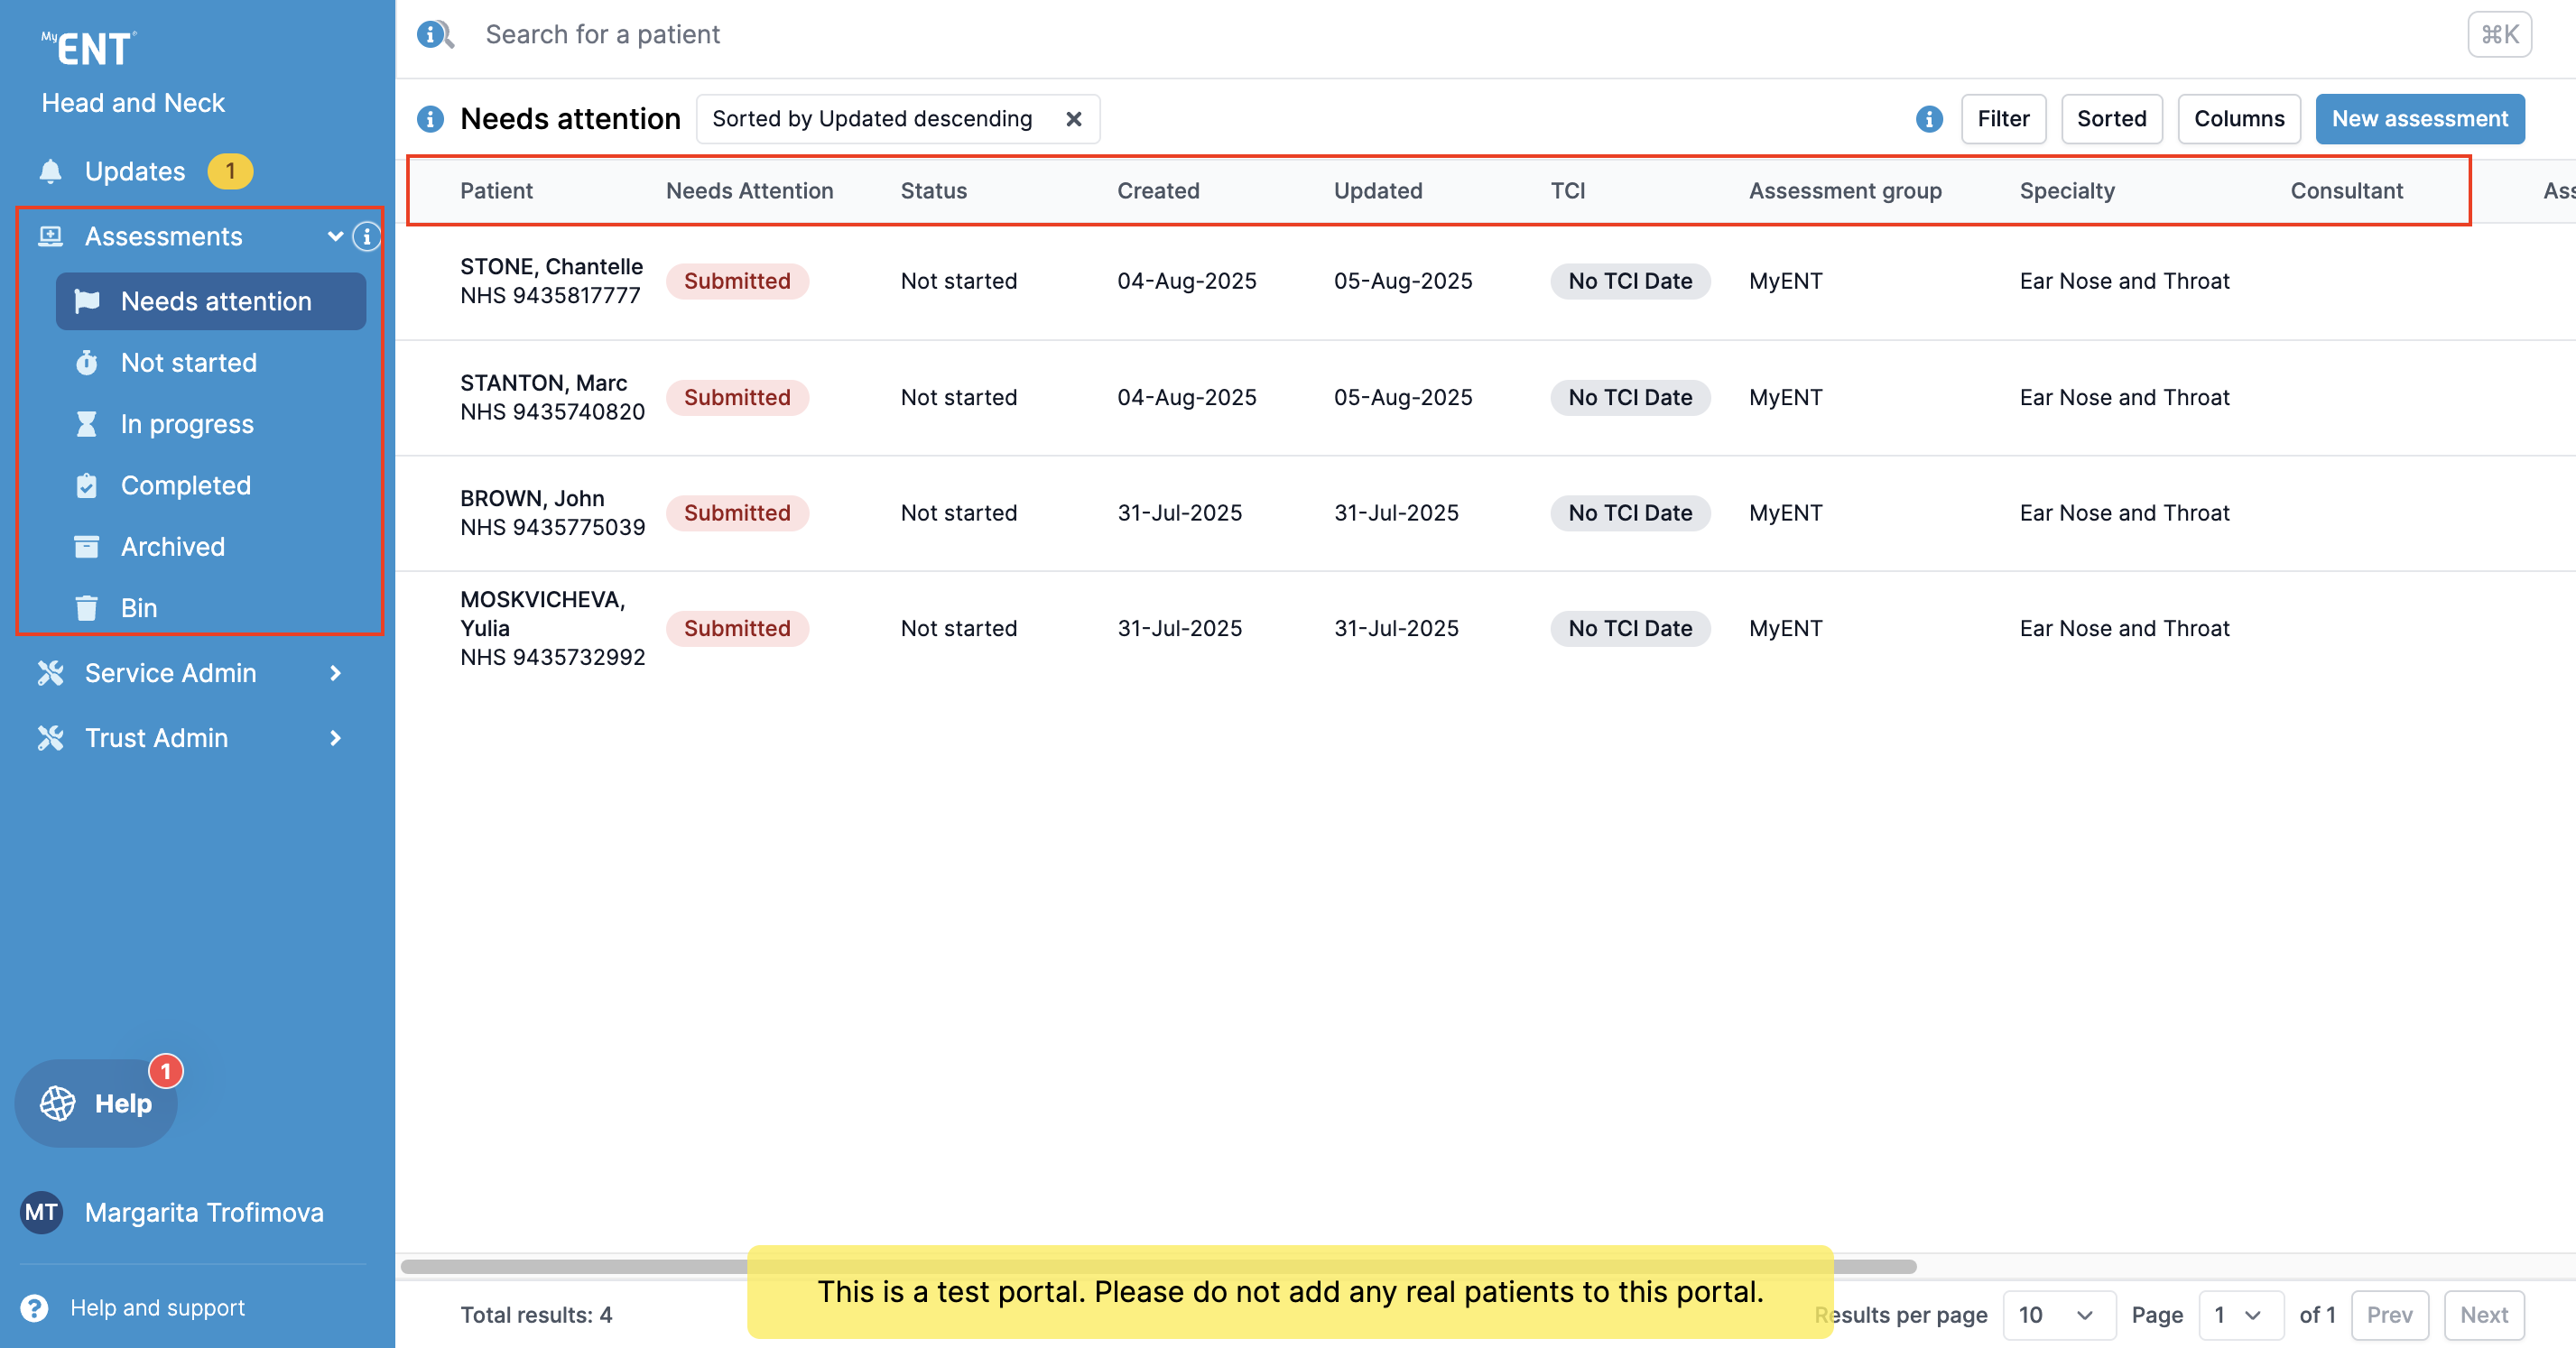
You can change, filter, and sort the view on your dashboard.
To make changes to your view, click on "Columns" and choose the columns you would like to have in your dashboard.
To filter or sort the assessments, click on "Filter" or "Sorted" and choose the property you would like to filter or sort by.
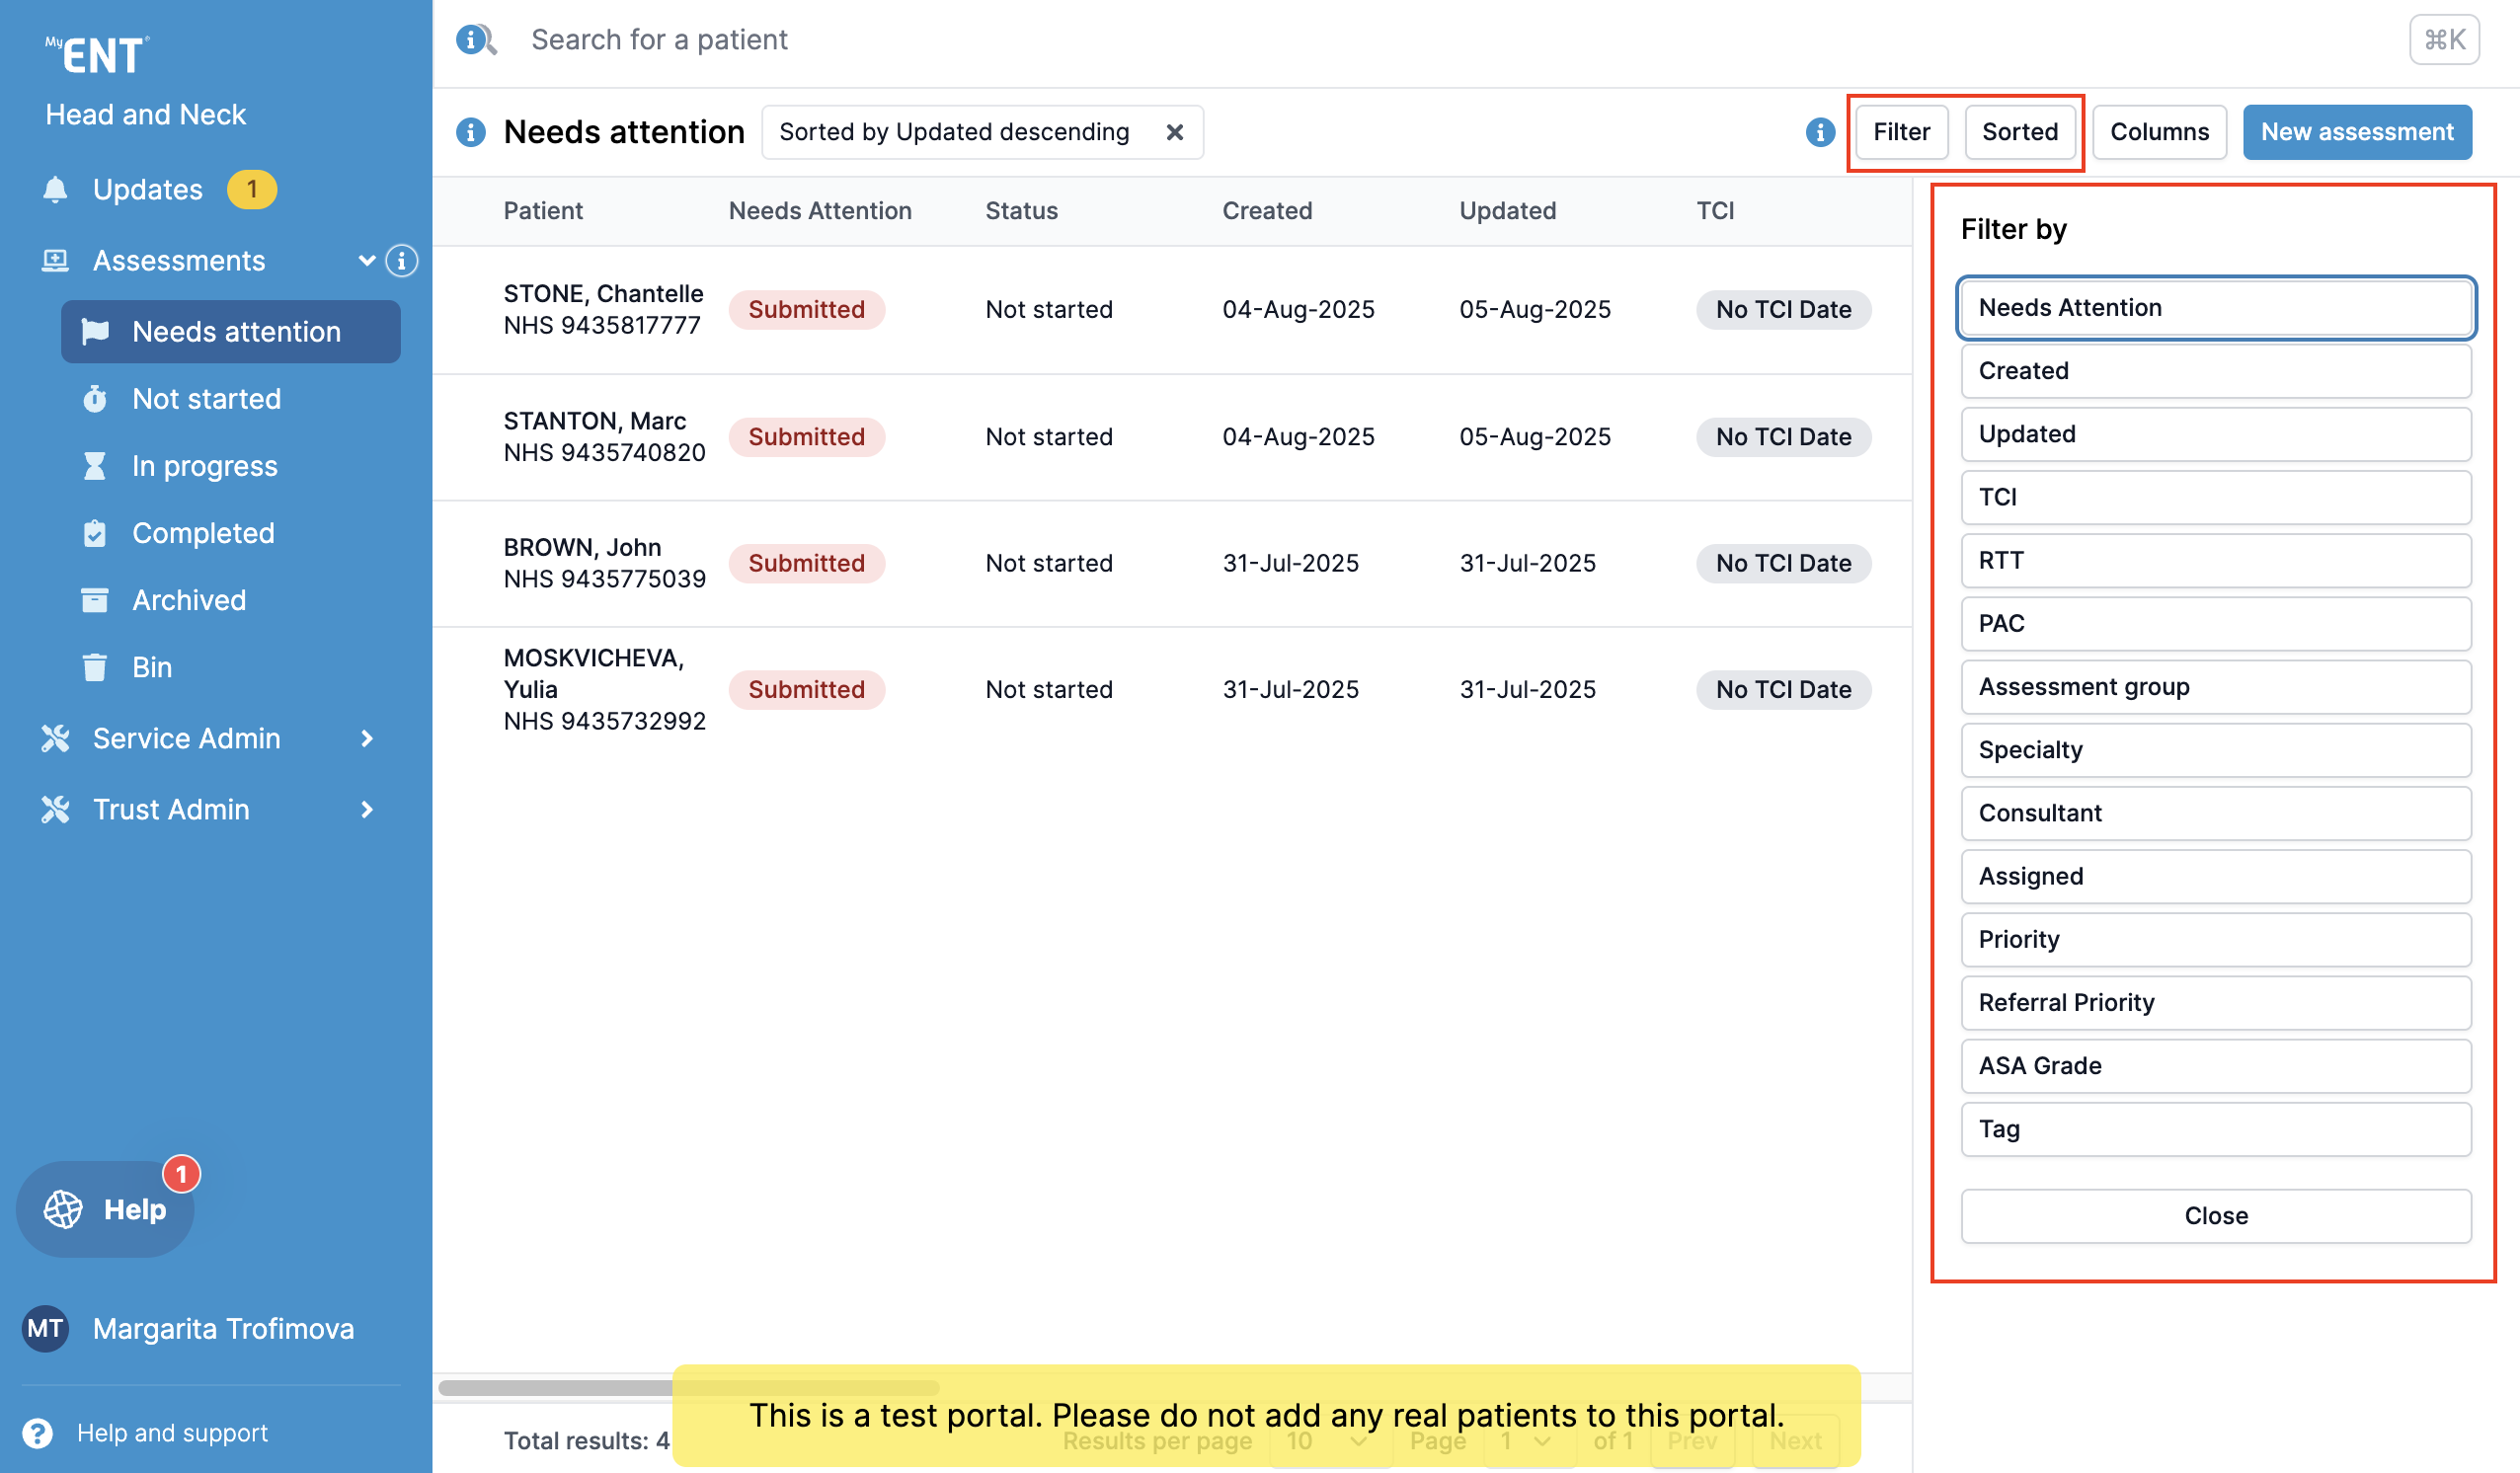
All changes will be saved until changed again manually.
How to navigate left side menu
Once logged into the Clinical Portal, you will be able to see lists of patients under the categories Needs attention, Not started, In Progress, Completed, Archived, and Bin.
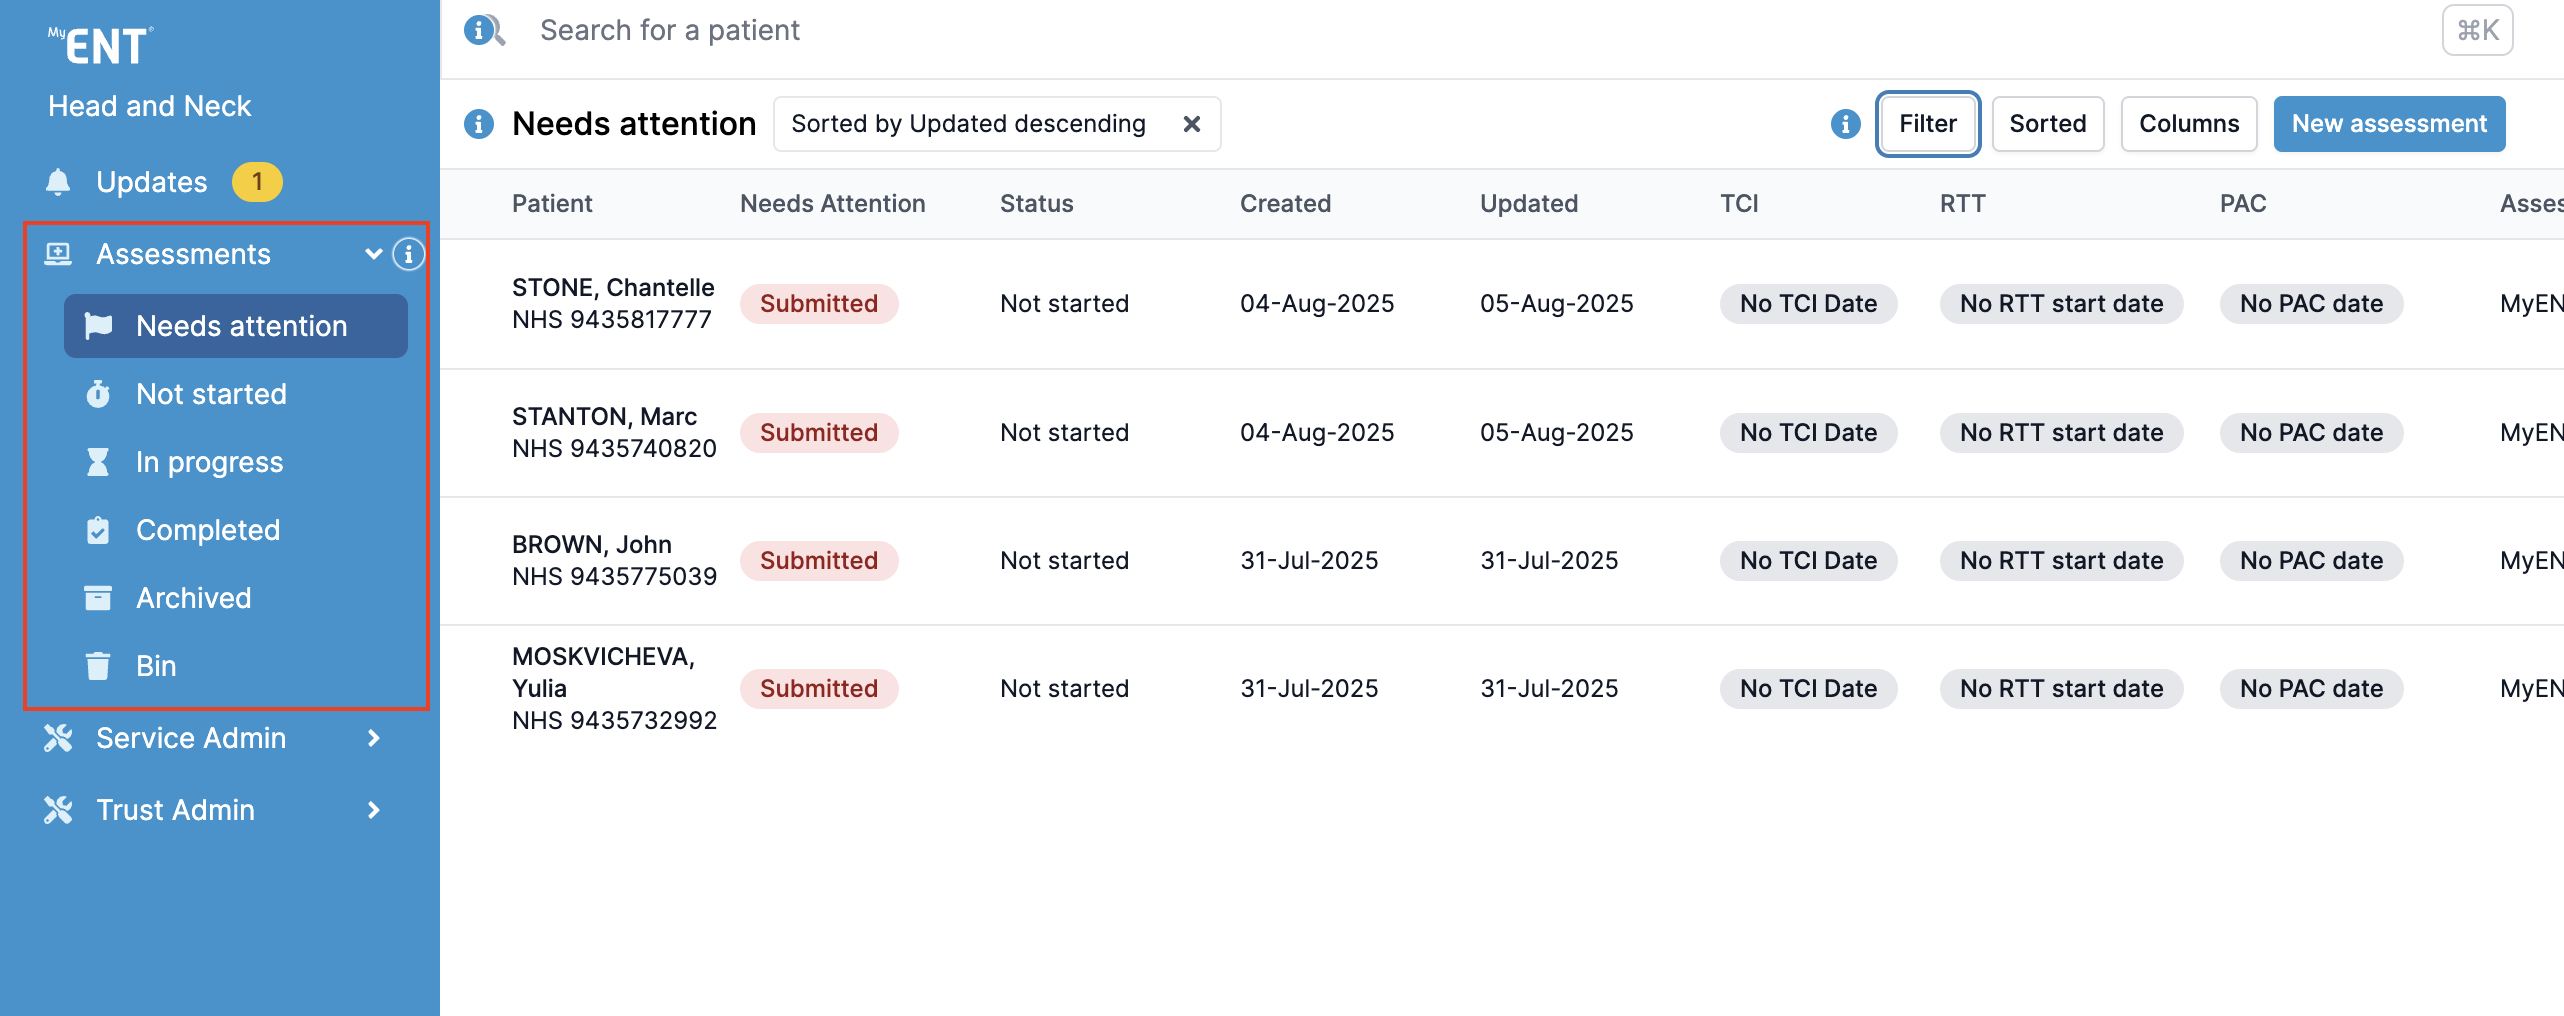
Needs attention - action required on an assessment;
Not started - assessment not yet actioned by portal user;
In progress - assessment is actively being worked on;
Completed - assessment has been completed;
Archived - assessment has been archived (for patients who have had their procedure);
Bin - test assessments and duplicate assessments completed in error.
How assessments are initiated
If your Trust has integration and ADT feed connection:
Patient invitation to complete an assessment is initiated by triggers in PAS selected during implementation process. As soon as patient details are entered in the correct field, the system will send them an automated invite asking them to complete an assessment.
Please note that due to individual portal configurations, some features might look different in your live portal.
If your Trust does not have the integration, follow the steps below:
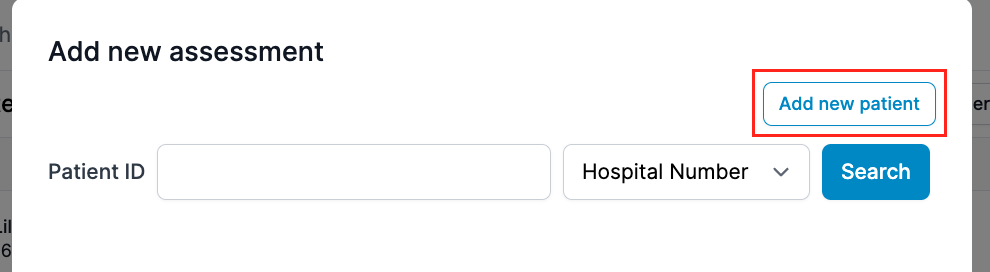
1. Click ‘New Assessment’ on the right-hand side of the screen.

2. In the pop-up box, you can search for a patient to see if they have already been registered in MyPreOp. Click in the search bar and type the patient's name. If they have an existing assessment, it will show underneath.
2.1. If your Trust's portal has integration, type in patient's NHS or Hospital number to pull the patient demographics from your PAS. Select the patient you would like to invite and follow step 4.
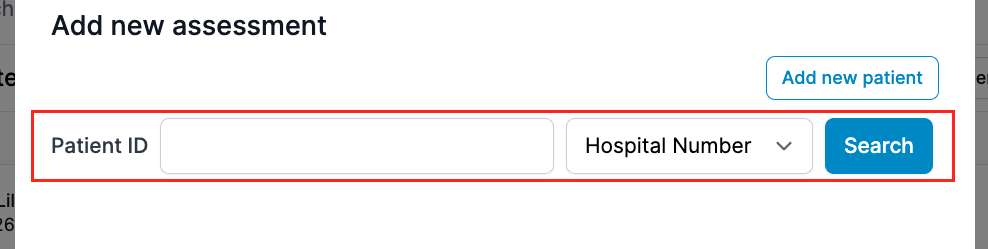
You can then click on the patient's name and complete the information to initiate the questionnaire.
3. If the patient has not already been registered in MyPreOp, click 'Add new patient'. You can then manually enter the patient data.
The fields marked with asterisk* are required to create the assessment. After entering this information, click ‘Create new patient’.
4. In the next box, you will need to review the patient data. If the patient's data is incorrect, you can make any necessary changes by clicking 'Edit'.
5. You can then select an Assessment Template from the drop-down menu. This will choose the correct Assessment group with a corresponding questionnaire.
Setting a Consultant, Procedure, Referral Priority, Priority, and TCI date are optional fields and can be added once the patient has completed their questionnaire. To add a procedure, enter the procedure code or name. Finally, select the preferred contact method for the patient and click ‘Create assessment’.
The patient will then receive an SMS or Email with their unique code to start their online pre-assessment.